Gardening, Day 2
More Southwestern food for the end of day two. The garden is now tilled and weed killer and organic material is in place. I have ordered all my plants too...four cucumber plants, six tomato plants, twelve pepper varieties, twenty-five strawberries, six raspberries and twelve herbs. Can't WAIT.
Southwestern Pot Roast
2 1/2 lb top round roast
1 Tbsp olive oil
1 c cabernet sauvignon wine
4 cloves garlic, peeled and crushed
5 tomatillos, halved and quartered
3 red bell peppers, cut into small pieces
1 large yellow onion, sliced or cut into small pieces
1 green serrano pepper, diced into small pieces
2 large potatoes, unpeeled, washed and diced
8 oz can of Mexican tomatoes (I used classic Rotel)
kosher salt
coarsely ground black pepper
Rub roast with salt and pepper. Heat oil in skillet and brown roast on all sides. Place all other ingredients in cooker and place roast on top of vegetables. Cook in large slow cooker (at least a 5 quart) for 9-10 hours on low. Serve by slicing roast and spooning sauce and vegetables over meat.
What I liked about this dish: It has an incredible peppery Mexican smell as it cooks.
What I disliked about this dish: It just barely fit into my larger slow cooker. The top of the roast is about a half inch below the lid. I had to really move the vegetables around to make enough room for everything.
Cool kitchen gadgets used: My santoku knives (I have three) are fantastic for prepping the veggies.
Tastiness factor: Very good and spicy, but not too bad. Great paired with Spanish rice. The meat was falling off the fork tender.
Oatmeal Pancakes
1 1/2 c whole oats
2 c milk
1 c all-purpose flour
2 1/2 tsp baking powder
1 tsp salt
2 Tbsp sugar
2 eggs, beaten
1/3 c canola or vegetable oil
Mix together milk and oats and let stand. Whisk together dry ingredients. Stir eggs into oat mixture and then add wet mixture to dry ingredients along with oil and whisk. Drop onto greased griddle in 1/4 c amounts and flip when edges bubble. Cook on both sides until pancakes are golden.
What I liked about this recipe: Very, very filling thanks to the oatmeal. Oatmeal is a very complex carbohydrate and fibrous too so this is an excellent breakfast to get you going when you are doing something strenuous, such as gardening.
What I disliked about this recipe: The pancakes took a little bit too long to cook in my opinion.
Cool kitchen gadgets used: Whisk was very handy for this recipe. However, now I want a long griddle that you can put over two burners. My large skillet only accomodated two pancakes at a time and it took probably 20-25 minutes to make all the batter.
Tastiness factor: Great taste. Not too sweet. Very different from regular pancakes and a little more nutritious due to the oats. I served it with maple syrup and the apples from a few days ago and fresh orange juice and it was a hit.
Kid Food, Chapter 2
Not only does McKenna adore this dish, but my friends like it too.
Macaroni and Cheese
2 Tbsp salted butter
2 Tbsp all purpose flour
1 c milk
1 c shredded mild Cheddar cheese
2 c cooked pasta
Melt butter in a saucepan and whisk in flour. Stir constantly and cook for about two minutes on medium until mixture is golden and bubbly. Whisk in milk. Lower heat to low and cook for about ten minutes or until mixture is thickened, stirring frequently. Add cheese and stir until cheese is melted and mixture is smooth. Combine cheese sauce with cooked pasta in a large bowl and serve.
What I like about this dish: It is SO versatile and SO easy. You can use any pasta (I used shells tonight) and just about any cheese (I used a Colby/Jack mix). It takes about three to four minutes longer than the box stuff does.
What I dislike about this dish: The color is not the same as the box stuff and some kids will turn their nose up at it. Easily remedied with a bit of food coloring....about six to seven drops of yellow will do it. Add some red if you like your mac and cheese orange.
Cool kitchen gadgets used: I love my whisk for this sauce.
Tastiness factor: It does need salt, I will admit, but for a kid dish, you don't want it overly salty. My daughter loves it and so do I.
Erica's Tips: Boil pasta for about ten minutes with salt and a little bit of oil to flavor the pasta and keep it from sticking together while draining. I always rinse my pasta before mixing in the sauce with it so that way my daughter can eat it right away and it is not too hot for her.
Great gardening food...
I am tilling this weekend to plant a garden. I have great dreams of making my own salsa with tomatoes grown from my garden, harvesting enough strawberries to make jam for the next year, not to mention being able to go out into the yard whenever I need fresh basil or parsley.
I probably will not plant for a few weeks, but I am getting ready.
As fuel for the fire or a great reward at the end of the day...what better tool to use than my slow cooker? I actually have two now...I bought a smaller four-quart size for side dishes.
Barbeque Chicken
2 lbs bone-in skinless chicken breasts
1 1/2 lbs bone-in skinless chicken thighs
18 oz bottle of barbeque sauce
3/4 c Coca Cola
one large lemon, sliced thin
one medium onion, sliced thin
Place chicken in 4 quart or larger slow cooker. Top with sliced onion and lemon slices. Whisk together barbeque sauce and soda in a small bowl and pour over chicken. Cook in slow cooker on low for six to eight hours.
What I liked about this recipe: Simple and easy.
What I disliked about this recipe: Nothing. It was easy.
Cool kitchen gadgets used: My large mixing bowl from Williams Sonoma with a pouring spout was especially helpful for this dish.
Tastiness factor: I'm sure this dish would be different depending on the barbeque sauce you used. I used Sweet Baby Ray's. It was pretty good although a tad dry (probably an hour less in the slow cooker would have done it) and a little strong on the lemon taste.
Grandma's Corn
8 oz package of cream cheese
1/4 c of unsalted butter
32 oz. package of frozen corn
1/3 c sugar
Place cream cheese and butter on low in slow cooker and let sit for 10 minutes until softened. Add sugar and corn and mix until the corn is coated with the cream cheese mixture. Cover and cook on low for 3-4 hours, stirring occasionally.
What I liked about this recipe: Very easy and only four ingredients.
What I disliked about this recipe: I let the cream cheese and butter sit in the Crock Pot for 20 minutes and it never got soft. Next time I make this, I'm using the microwave to soften it a tad more so it will be easier to coat the corn.
Cool kitchen gadgets used: This was my 4-quart cooker's debut! I bought it specifically for side dishes!
Tastiness factor: Great, great taste although it cooked for the full four hours and the corn was not very soft. I would probably go five hours next time. Great flavor though...very sweet and lovely creamed corn taste.
Johnny Appleseed Bread
5/8 c unsweetened apple juice
1/2 c unsweetened applesauce
1 1/2 Tbsp unsalted butter, cut into small pieces
3 Tbsp dark brown sugar
3 c bread flour
1 1/2 tsp salt
1/2 tsp cinnamon
pinch of grated nutmeg
1/2 c cored, peeled and finely chopped Granny Smith apple
1/4 c raisins
1 1/2 tsp active dry yeast
Place all ingredients in bread pan in order listed. Select 1.5 lb loaf, standard baking cycle and light crust. Remove bread from pan at end of the baking cycle and let cool one hour before slicing.
What I liked about this bread: Lots and lots of apple stuff in it.
What I disliked about this bread: Too wet and the dough was stickier than anything when I went to remove the blade from the machine.
Cool kitchen gadgets used: I have a nutmeg shaker full of whole nutmeg that I used to "grate" the nutmeg. I don't even know where you would get whole nutmeg, but I wouldn't buy it just for a pinch for this recipe. I would use a pinch of ground if I didn't have my shaker. My mezzaluna was very, very useful for chopping up the apple very finely.
Tastiness factor: Great flavor but a little too chewy...kind of doughy. I would cut the liquid amount next time.
Erica's Tips: Even though the recipe didn't say, I held the apples and raisins out and added them in when the machine beeped for the mix-ins. I also rehydrated the raisins by soaking them in boiling water for about twenty minutes and tossed the apples with a bit of lemon juice to help prevent browning.
Fudge Brownie Pie
1 c sugar
1/2 c unsalted butter, melted
2 eggs
1/2 c all purpose flour
1/3 c unsweetened baking cocoa
1/4 tsp salt
1 tsp vanilla extract
1/2 c chopped pecans
In a mixing bowl, combine sugar and butter. Add eggs and beat well. Stir in flour, cocoa and salt. Mix in vanilla and pecans. Pour into a greased and floured 9" pie plate. (No crust.) Bake at 350 degrees for 25-30 minutes.
What I liked about this recipe: I had everything on hand and it took less than ten minutes to mix up and put in the oven.
What I disliked about this recipe: Not a thing.
Cool kitchen gadgets used: I love my Pyrex pie plates and used a pink one for this dessert.
Tastiness factor: Good. Nice basic brownie recipe and great with ice cream.
Garlic bread
If you keep fresh Parmesan in your fridge, this is a pretty easy no-nonsense bread to have with dinner. I just popped it in after lunch the other day and it baked while I worked.
Garlic Bread
3/4 c water
1 Tbsp olive oil
2 Tbsp freshly grated Parmesan cheese
1 Tbsp sugar
1 tsp salt
1 clove of garlic, crushed or minced
2 c bread flour
1 Tbsp dried chives
1/2 tsp dried sweet basil
1/2 tsp garlic powder
1/2 tsp black pepper
1 1/2 tsp active dry yeast
Add all ingredients to the bread machine in the order given, select 1 lb loaf size, light crust and standard cycle. Remove from machine after baking cycle is complete and let cool one hour before slicing.
What I like about this bread: You can use fresh garlic (some recipes call for that jarred stuff that you get in the produce section and I don't like to use that because I don't use it for anything else and it would go to waste) and fresh Parmesan and all dried herbs. I can't wait until my herb garden takes off and I can cut fresh herbs from my garden for this bread.
What I dislike about this bread: Nothing. It's fantastic. Maybe that I have to wait three hours for it to bake to eat it?
Cool kitchen gadgets used: I love my garlic press. It has two styles...slicing or mincing/crushing. I used the mincing/crushing side for this recipe. You just put the garlic in the little chamber and just run it up down until the garlic is ready.
Tastiness factor: This is the BEST bread and all you have to do is slice and serve. It is SO flavorful and yummy.
Scalloping
Here are some easy side dishes that I made to go along with steaks this week. Very easy although a little time-consuming on the prep.Easy Scalloped Potatoes1 Tbsp salted butter1 Tbsp all-purpose flour3/4 tsp salt1 3/4 c milk5 c sliced and peeled potatoesMelt butter in a saucepan and whisk in flour and salt. Add milk and stir constantly until mixture boils. Add potatoes and stir occasionally until potatoes are tender. Pour into a greased 13" x 9" baking dish. Cover with foil and bake at 350 degrees for thirty minutes.What I liked about this recipe: There were no weird ingredients and it is a very straightforward recipe.What I disliked about this recipe: It takes a long time to prepare before you even put it in the oven. I could never get the potatoes to quite tender before putting it in the baking dish. It still came out fine but was a little more time-consuming than I thought it would be.Cool kitchen gadgets: My peeler works great for potatoes.Tastiness factor: Very, very good, although a little too much work considering that baked potatoes would have tasted just as good.Escalloped Apples10 c tart apples, peeled, cored and sliced1/3 c sugar2 Tbsp cornstarch1 tsp cinnamon1/4 tsp nutmeg2 Tbsp unsalted butter, chilled and slicedPlace apples in a 2.5 quart microwave-safe bowl and set aside. Combine sugar, cornstarch, cinnmamon and nutmeg in a small bowl and whisk to combine. Add to apples and toss to coat. Dot with butter. Cover and microwave on high for 15 minutes, stopping to stir mixture every five minutes.What I liked about this recipe: It wasn't too sweet. I was a little apprehensive to make it, thinking it would be more like a dessert than a side dish.What I disliked about this recipe: The 2.5 quart dish is not big enough to properly toss the apples. I added the apples to the dish and then had to transfer them to a bigger mixing bowl to properly toss the apples to coat them. Not a huge deal but a little annoying because I then got apple juice all over the sides of the casserole dish.Cool kitchen gadgets used: My peeler works great on apples too.Tastiness factor: This is a good fruit side dish. Not too sweet, not too syrupy, just right. Very similar to the apples at Chili's except a little lighter. I have had it since dinner for a mid-afternoon snack and with breakfast this morning. It would be great over pancakes, waffles or ice cream. Spicy Steak Marinade1 Tbsp Worcestershire sauce1 Tbsp red wine vinegar2 tsp Tabasco sauceCombine all ingredients in small bowl and whisk to combine. Brush steaks with marinade and add to bowl. Sprinkle coarsley ground black pepper on both sides of steak. Let steak sit for 5-10 minutes to marinate and then broil or grill to desired temperature.What I like about this marinade: It is very easy and everything to make it is in the cupboard. It also does not require overnight marination which makes it ideal for a steak dinner on the fly.What I dislike about this marinade: The quantity given above is not quite enough for filets or strips. It's perfect for a London broil but for filets or strips, I double it.Cool kitchen gadgets used: I love my silicone pastry brush. It has far outlasted its nylon predecessors and it is ideal for dishwasher cleaning.Tastiness factor: This is a great basic marinade and is not too spicy at all. The Tabasco does not make it as spicy as you think and the vinegar really make the steak tender. I would recommend letting the steaks warm to room temperature for about 20-25 minutes before marinating and then leaving steaks on counter while marinating. The steaks will cook much better.That's all I have for today. Have a great weekend!
My Southwestern feast
Hi everyone! I just got back from Arizona, and came back armed with a great Arizona cookbook and a Southwestern slow cooking cookbook. What better way to wind down after a long plane ride than to spend a few hours back in my kitchen getting reacquainted with my appliances and a nice glass of wine?Montezuma Chicken Bake6 c cooked cubed chicken12 6" corn tortilla, cut into 1 1/2" strips1 1/2 lbs of shredded Monterey Jack cheese16 oz container of sour cream14 oz can of tomatillos, drained1/2 c chopped onions1/2 c cilantro leaves, packed4 oz can of green chilies, undrained2 cloves of garlic, crushed1 tsp salt1/2 tsp sugarIn food processor, combine tomatillos, onions, cilantro, chilies, garlic, salt and sugar and process until smooth to make a green sauce. Grease a 13x9 baking dish and start layers with half of the chicken on the bottom, half of the green sauce, half of the sour cream, half of the tortilla strips and cheese. Repeat, ending with the cheese. Cover with foil. Dish may be prepared ahead of time and refrigerated up until this point. Bake, covered, at 375 degrees for 35 minutes or until cheese is melted and bubbly. If refrigerated, cooking time will be 45-50 minutes.What I liked about this dish: I was able to be a little creative! I substituted the Mexican blend cheese for the Monterey Jack, I accidentally picked up canned jalapenos instead of chilies because I wasn't paying attention (and cut it to half the can), and when I cooked the chicken, I added some chicken rub to it to give the chicken a nice flavor. All of the cheese makes this a great dish.What I disliked about this dish: The prep time is a little extensive and I was so distracted about halving all of the "layer ingredients" that I mixed up the order and forgot the first layer of tortilla strips. It turned out fine though. Also, in my store, tomatillos only come in a 28 oz can, so I had to guestimate on the amount needed. I wish the recipe had listed the drained tomatillos needed in weight. Also, I bought only one flat of chicken, thinking that would yield 6 cups of cooked chicken. NOT even close. You will need six chicken breasts for this recipe. One breast yields a cup. I had to stop in the middle of my prep and defrost a few breasts out of the freezer so I would have enough chicken for this recipe. Thank goodness I had some in the freezer.Cool kitchen gadgets used: My food processor makes great salsas, so making the green sauce in it was a breeze. Tastiness factor: Delicious. Probably one of THE best Mexican dishes I've ever made. And it makes a LOT. There will be a ton for leftovers this week. I would easily make this for a party...it will easily feed six or eight people.Skillet Spanish Rice1 c instant rice2 Tbsp vegetable oil1/4 c finely chopped onions2 c chicken broth1 Tbsp taco sauce1 tsp cumin1/2 tsp garlic powderSaute rice and onions in oil heated in large skillet until slightly golden. Add remaining ingredients and bring to a boil. Reduce heat to simmer and cook, covered, for 15 minutes. What I liked about this recipe: It was easy and quick.What I disliked about this recipe: Not as tomatoey as I like my Spanish rice to be.Cool kitchen gadgets used: I have this tiny little chopper that I bought for baby food a few years ago and it is great for chopping small amounts of vegetables like I needed for this recipe, and my food processor was dirty from the green sauce for the chicken dish.Tastiness factor: It was not a bad dish and all of it disappeared. However, it was a little plain and bland for my taste. If your biggest objection to most Spanish rice dishes is the spiciness, you will probably like this.Golden Cornbread1 c cornmeal1 c all-purpose flour4 Tbsp sugar4 tsp baking powder1/2 tsp salt1 c milk1 egg1/2 c vegetable oilCombine dry ingredients in a bowl and mix thoroughly. Add milk, oil and egg and beat about one minute until smooth. Pour mixture into a greased 8x8 pan and bake at 425 for 23 minutes or until a knife inserted comes out clean.What I like about this recipe: Easy and no-fail.What I dislike about this recipe: The first couple of times I made it, I did not find it sweet enough for me, so I upped the sugar to 6 tbsp and it was better. Cool kitchen gadgets: I love my 8x8 glass Pyrex baking dish. It has a plastic cover which makes it perfect for storing the leftovers.Tastiness factor: Great. Just great!Lemon Pudding2 c sugar2 Tbsp butter2 Tbsp all-purpose flourjuice and zest from 1 large lemon or 1 1/2 small2 eggs, separated1 c milkCream sugar and butter together and add flour. Blend in lemon zest and juice until smooth. Add egg yolks and milk. In separate bowl, beat egg whites until stiff peaks form and fold whites into lemon mixture. Spread in a greased 1 qt casserole dish and place in a shallow baking dish with 1/2" of water in it. Bake at 350 degrees for 35 minutes.What I liked about this recipe: It was FAST.What I disliked about this recipe: I did not like that it did not specify the exact amount of zest and lemon juice needed. I measured out what I put in and I ended up using a little less than a 1/2 c of zest and a little less than a 1/3 c of juice. It turned out very lemony and was perfect.Cool kitchen gadgets used: I had bought this 1 qt Lucerne casserole dish at Crate and Barrel about 2 months ago and I finally got to use it for this recipe!Tastiness factor: I ate it when it was still pretty hot, so it was a little runny and liquidy. I don't know if it still will be today. It kind of had a souffle like top and then lemon pudding on the inside. Very, very good and sweet...great lemon taste. It was a great quick dessert to make for company.Sassy Sangria1 gallon red burgundy wine1/2 c sugar48 oz can pineapple juice8 oz can pineapple chunks1 lime, cut into rounds1 orange, cut into rounds.Combine wine, sugar and juice. Add fruit. Chill before serving.What I liked about this recipe: It required no overnight chilling...many of my other sangria recipes do.What I disliked about this recipe: It was hard to get the sugar to dissolve, even with the wine at room temperature.Cool kitchen gadgets used: I finally came up with a use for my water bath canner...it is going to be my sangria pot! I also have a neat terracotta sangria pitcher that I serve it in...it has a pinched spout to keep the fruit from going into the glasses.Tastiness factor: Eh. That's about it. This was not the best sangra recipe I have ever had or made. But it was fast, quick and cheap, and that's what I was looking for. Definitely not as sweet as I would have liked...I ended up adding diet Sprite to it to sweeten it up a bit to my liking.I also made this bread for my father-in-law a few days ago. While I did not personally get to try it, I heard it was fantastic.Certainly Citrus Bread7/8 c milk1 1/2 Tbsp unsalted butter1/3 c orange marmalade1 Tbsp lemon juice1 Tbsp lime juice1/8 tsp lemon zest3 C white bread flour1 1/2 tsp salt2 tsp active dry yeastAll ingredients should be at room temperature. Add to bread machine in order given. Select white bake cycle, 1/2 lb setting and light crust. Let cool on wire rack one hour before slicing.What I liked about this bread: I had everything in my fridge to make it! I basically decided to make it that morning and didn't have to run to the store. Even though I'm sure it would have been better with fresh squeezed juices, I just used the lemon and lime juices I had in the refrigerator.What I disliked about this bread: I didn't get to try it since it was a gift. Cool kitchen gadgets used: I love my microplaner....awesome for zesting citrus!Tastiness factor: I heard it was great! Very citrusy and light and wonderful paired with my apricot jam.What a fantastic meal! Muy bueno!
Another recipe request-best apple pie ever
One of my friends, C, wanted to make a homemade apple pie for her boyfriend J for Valentine's Day this week. She wanted some suggestions, as she had heard about this great apple pie from some restaurant in the Northeast. So I pulled out my books looking for her...I searched through Killer Pies, which has pies from great diners and cafes around the country, Pie (that's actually the name of the book) and my vast collection of Gooseberry Patch wonders, and nothing really floated her boat...until she heard my grandma's recipe.
This is the only recipe I have ever made for apple pie. I got it from my grandma probably about twelve years ago and she gave it to me over the phone. I wrote it down on an index card, and then rewrote it again this Christmas since the old one was starting to fade from use. I have literally made this pie about fifty times. It gets more requests than just about any dessert I have ever made over the years (not even my cheesecakes are requested as often) and has some funny stories that go with it, one particularly funny one (not funny at the time) from a Christmas long ago where my dad dumped my freshly baked apple pie on the floor. (Sorry, Dad....it fit the story to mention it.)
Here it is. Enjoy!
Grandma Mae's Apple Pie
six apples, peeled, cored and sliced **I prefer Fuji, but you could use any apple you want. Rome apples work well and if you want a pie not so sweet, Granny Smiths work well too.
two 9" pie crusts, either homemade or store bought
1/3 c all purpose flour
1 c sugar
2 tsp cinnamon
dash salt
dash nutmeg
3 Tbsp butter
Place pie crust in pie dish and fill up with apple slices until pie has reached desired height. Remove slices to a mixing bowl and add dry ingredients. Mix with hands until slices are coated. Spoon slices back into pie crust. Place pats of butter on top of apples. Place second pie crust on top of apples and seal edges. Flute with a fork and cut three vents in pie crust for steam. Bake at 425 degrees for 15 minutes and then reduce heat to 350 degrees and bake for 30 minutes. Cool on wire rack.
What I like about this pie: It is fantastic and comes out perfectly every time. Enough said.
What I dislike about this pie: Um, the time it requires to peel the apples?
Cool kitchen gadgets used: I have a special apple pie dish that was a gift years ago from my stepmom. I only use it for apple pies. It is my special apple pie dish. It is a dish by Marjolein Bastin (all you stitchers out there know her!) and the apples are beautiful.
Tastiness factor: This is just a great, great apple pie. It is the one dish that my father-in-law and my father request every holiday.
Erica's Tips: I strongly recommend placing a cookie sheet on the rack below the apple pie to catch drips unless you are just dying to use the clean cycle on your oven. You might have some juicy apples. Also, I recommend serving this pie with Breyer's Vanilla Bean ice cream. Yummy. The only variation I have made to this pie over the years was one Thanksgiving where I added brandy to the pie. I would not recommend that. If it ain't broke, why fix it? I suppose you could substitute brown sugar for the regular sugar and add nuts to the apples if you wanted to get crazy.
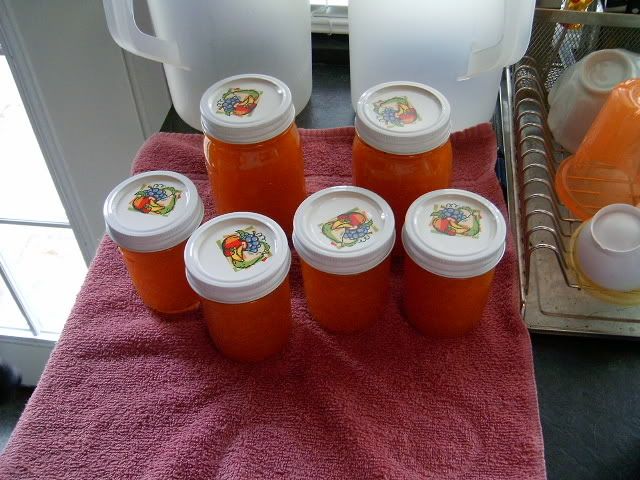
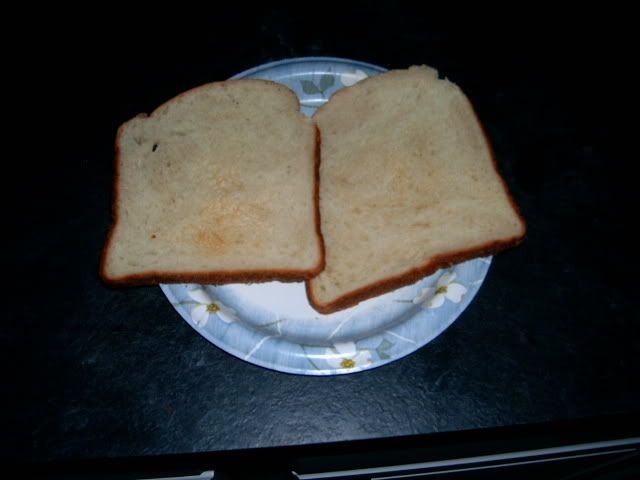
Apricot Jam
My friend C mentioned that her boyfriend J also mentioned that he really thought apricot jam was delicious. I had never heard of such a thing, let alone tasted it. So, I decided I would try it.Unfortunately, due to the fact that there are no fresh apricots available and no frozen ones available, I bought eight packages of dried Mediterranean apricots and rehydrated them by soaking them in boiling water for thirty minutes and then running them through the food processor. Seemed to work fine although I'm sure fresh would have been better. Apricot Jam2 quarts of peeled, crushed, pitted apricots6 cups sugar1/4 c lemon juiceCombine all ingredients in a large stockpot and bring slowly to a boil, stirring frequently. Cook to the gelling point and ladle hot jam into hot jars. Process in water bath canner for 15 minutes OR use inverting method (thanks again, Kelley!) to seal jars.What I liked about this recipe: Pretty easy to make and it makes a lot. I got two pint jars and four half-pint jars out of it, and since I only bought 1 1/2 quarts of apricots, I cut the sugar to 4 1/2 c and the lemon juice to 3 Tbsp.What I disliked about this recipe: Again, it bubbled violently and this time burned my index finger. I think I'm going to have to invest in a taller stock pot soon.Cool kitchen gadgets used: I bought a flat of quilted jelly jars with fruity lids and fruity labels. See picture. They are pretty cute.Tastiness factor: Very good although I have no doubt that fresh apricots would have been much better. I had it this morning on toast and it was very tasty, although the first thing I thought of when I ate it was how much it tasted like dried apricots. Oh, well. Still very very good and very sweet. I have already unloaded a jar on my dad and stepmom as a hostess gift and one on my father-in-law, so we'll see how everyone likes it.
A sweet bread and an unsweet bread
Have I mentioned that I LOVE my bread machine!?!?! Geez. Talk about an awesome appliance. Please tell me that there are some readers out there that are enjoying my bread machine recipes. Unfortunately, I just don't have any bread recipes that are made the old fashioned way and I don't anticipate posting any. If you are contemplating trying out bread machine bread, I seriously recommend it...I LOVE LOVE LOVE my Cuisinart.
If you are reading and are addicted to your bread machine like I am, please speak up...I gotta know that I'm not alone!
Gingerbread Loaf
3/4 c milk at room temperature
2 eggs at room temperature, beaten
1/3 c mild molasses
1/4 c unsalted butter, cut into small pieces
4 c bread flour
4 tsp light brown sugar
1 tsp salt
1 tsp cinnamon
1 tsp ground ginger
1 1/2 tsp active dry yeast
Add ingredients to machine in order given. Select 2 lb loaf size, light crust and basic cycle. Remove baked loaf from machine and cool on wire rack one hour before slicing.
What I liked about this bread: It gave me an excuse to replace my old molasses, which popped when it opened. I don't know how old it was, but I'm venturing to guess that I bought it when I got my OLD bread machine about twelve years ago.
What I disliked about this bread: It's the first loaf that I have made in my bread machine that has split at the end of the baking cycle. Plus, there is a tiny area right in the top that did not bake all the way...kind of mushy and gross.
Cool kitchen gadgets used: None this time...didn't require any prep work.
Tastiness factor: Very good. Nice and spicy but not overly sweet.
Tomato-and-Basil Bread (sorry, I didn't have time to take a picture before I left for my trip to Phoenix!)
1 1/3 c tomato juice at room temperature
2 Tbsp olive oil
1/3 c freshly chopped basil leaves
3/4 tsp salt
1 1/2 tsp sugar
3 Tbsp rye flour
4 c bread flour
2 1/4 tsp active dry yeast
Add ingredients to bread machine in order listed. Select 2 lb size, French cycle and light crust. Remove baked loaf at end of cycle and let cool at least one hour before slicing.
What I liked about this bread: I got to use the tomato juice from my tomato basil soup I made several weeks ago. WHO KNEW YOU COULD FREEZE TOMATO JUICE!?!?! Plus, it gave me an excuse to add to my ever-growing collection of flours...I now own all-purpose flour, bread flour, cake flour, cornmeal and RYE FLOUR. I keep it all in the freezer except the cake flour which is kept in the cabinet...reason being is because cake flour contains the lowest amount of protein and is the least likely to go bad quickly. Plus, it comes in very small bags and doesn't last long at my house.
What I disliked about this bread: I bought a fresh pack of basil leaves and thought that would be enough. It was JUST short of 1/3 c once I chopped them. I'm sure it's fine though. This is making me think I need to plant an herb garden again...
Cool kitchen gadgets used: My mezzaluna, once again, came in VERY handy for mincing the basil and this time I didn't take a chunk out of my finger.
Tastiness factor: It wasn't a bad bread, but it was not the tasty yummy tomato and basil flavor that I had imagined. I had to put a little salt on it to bring out the flavor. Not my favorite.
Kid food
One of the things I am trying very hard to do is incorporate more home-cooked food into McKenna's diet. I did SO great for a while with all the homemade baby food, and then after I was promoted, it just kind of went downhill from there. So I'm trying to get back to that place. It's tough finding things that a toddler will eat willingly, and even though I'm sure she would survive on Nutri Grain cereal bars and Cheetos if I let her, I don't think that's probably a very nutritious diet. Just a thought there.
I have a TON of cookbooks for babies and toddlers, and I shelved so many of the recipes because they used foods that she wasn't ready for yet or I didn't think the recipe would puree well. This is one that I had eyed for a while.
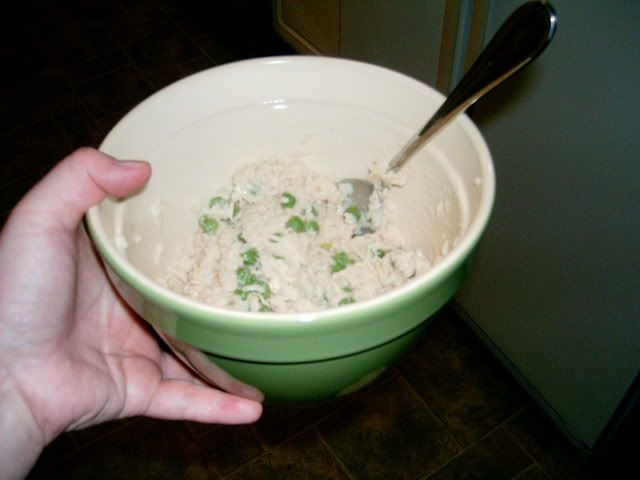
Risotto 1/2 c uncooked short-grain rice
1 1/2 c chicken broth
1/2 c shredded cooked chicken
1/2 c frozen peas, thawed
2 Tbsp shredded Parmesan cheese
Bring rice and broth to a boil and boil uncovered for ten minutes. Add chicken and peas, cover, and reduce heat to medium. Cook for an additional fifteen minutes. Remove from heat, transfer to another bowl, and stir in cheese. Let cool and serve.
What I liked about this recipe: I had everything on hand. No weird ingredients that required me running to the store. I substituted long-grain rice for the short-grain rice, I defrosted leftover chicken broth that I had in the freezer, I grabbed a chicken breast out of the freezer bag, chopped it up and sauteed it in some olive oil real fast and grabbed some peas out of the freezer that had been in there for a while. I think I had bought the Parmesan cheese for another recipe and not used it because it was unopened. Perfect.
What I disliked about this recipe: The cooking times are REALLY, really off. After seven minutes on the first run, the rice had already absorbed all the liquid and was starting to stick to the bottom. I threw in the chicken and the peas and probably 2-3 minutes of that and it was ready to eat. I had to add probably 1/4 c of water to it after I added the chicken and peas so that I would not burn the rice. I don't know if that had anything to do with the fact that I used long-grain rice, but somehow I doubt it...I would think that with long grain rice, it would cook SLOWER, not faster. If I had believed the recipe and actually let this dish cook for the recommended times, there's no telling what I would have ended up with and my saucepan probably would have been ruined. Fortunately, I learned the hard way with this cookbook when I made Mexican rice for McKenna about two years ago...those cooking times were off too. I'm starting to think that the author of this cookbook makes all of her rice dishes with a stove that is broken!
Cool kitchen gadgets used: The pulse feature on my food processor was very handy for shredding the chicken. I am going to use the leftovers to make this dish again next week, probably. One breast makes probably about 1 1/2 c of shredded chicken.
Tastiness factor: Simple but tasty. I put about a cup in a bowl for McKenna and when I went over with my bowl to see if she ate all hers, she put her fist out to grab the rest of mine out of my bowl since her bowl was empty. Then she ate the rest of what was in the bowl! No leftovers. Guess that means she liked it! It's a very kid-friendly dish.
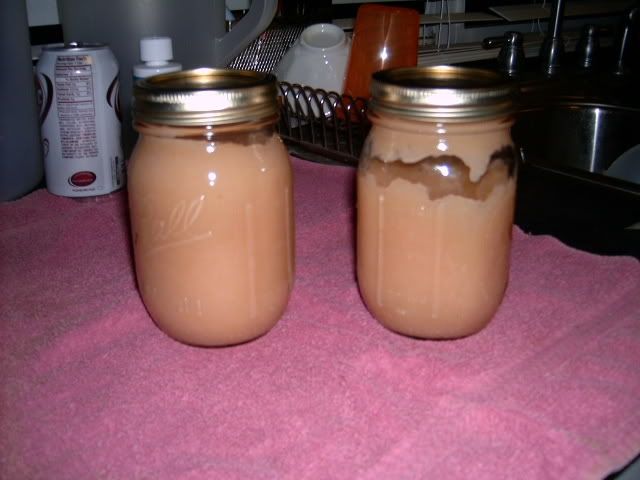
Pearsauce
3 1/2 lbs of pears, peeled, cored and sliced
1/2 c water
1/4-1/2 c of sugar
spices (optional)
Cook pears in water over medium heat until tender and drain. Puree in a food processor. Return pears to pan and add sugar to taste. Bring to a boil until sauce reaches 212 degrees. Add spices during last five minutes of cooking. Ladle sauce into hot jars and seal. Process in a water bath canner OR using the inverted method (thanks, Kelley). Let jars cool and store.
What I liked about this recipe: Pears smell SO good cooking. McKenna loves applesauce, so I thought I would make this instead for a change. You can't buy pearsauce in the store and pears are so great.
What I disliked about this recipe: *sigh* I wanted to try it, so I only bought 3.5 lbs of pears. That only yielded two pints of pearsauce. Talk about a very expensive pearsauce. I don't know what I did but it sure seemed like a LOT of work for very little return. I hope my princess likes it. Plus, I couldn't get the temperature over 170 degrees. I let it boil on high and it just would not go any higher than that. I finally just took it off and I'm going to put the jars in the refrigerator.
Cool kitchen gadgets used: I used my kettle to boil water to sterilize my lids in before sealing on the jars.
Tastiness factor: Very good. I tasted a spoonful to make sure no additional sugar was needed and it was good. I forgot to add cinnamon to it though...I was too distracted by the fact that I couldn't get the temperature anywhere above 170 degrees. I'm still learning this canning business. But it did pop nicely when I opened the lid this morning.
OVERLOAD ALERT!!!! Tons of recipes forthcoming...
I have had this post typed for about ten days and I just keep adding to it and adding to it and adding to it. Work has been NUTS! But I have still been cooking...I just can't seem to finish a post without starting to get sleepy. Thank goodness for the draft button. So if you've been thinking that I disappeared from the blog world altogether, the answer is NO...I've just been super duper busy. I'm going to Phoenix Thursday to visit my father and stepmother and go skiing, so I'll probably post another recipe or two before I go and then nothing until sometime next week.
There are pictures now, but because my company deleted the picture editing software off my laptop and Photobucket won't make them small enough that they won't throw off the layout, the link is embedded in the recipe title from now on. Just click on the title to see the picture. Sorry about that.
Canning update first. Kelley, thanks so much for the tip on the canning. I'm going to try that today when I make my apricot jam. I did go to Wal-Mart this week and picked up the biggest pot they had, and it still wasn't big enough for the rack. *sigh* So, I am either going to get a pressure cooker/canner from Presto OR a single-burner so I can boil the pot that came with my kit...kind of like the crystal meth makers do. Funny, funny. Anyway, I will try the inverting method that you gave me today, Kelly...I can't wait to give it a try.
For some reason two weekends ago, I just got a wild hair to do a lot of cooking. Oh, yeah, and the fact that several of my ingredients probably would have spoiled if I did not. And this week I have made a few things also, last night McKenna and I made a cake, and since I'm so behind on posting recipes, well...enjoy!
There are some funny stories that go along with these recipes, so enjoy reading...and I finally got my camera working so I have pictures too!
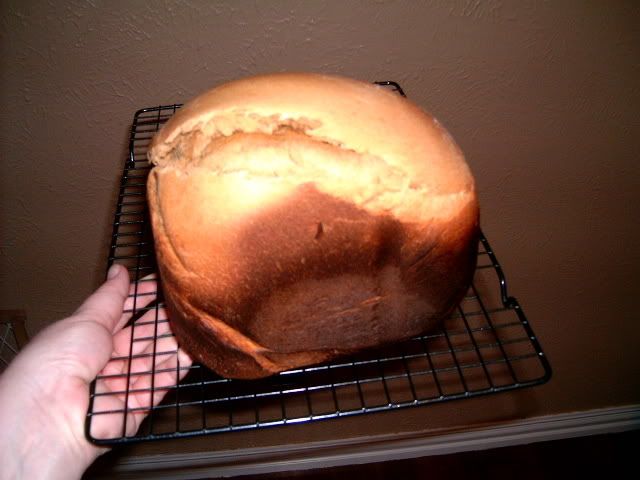
Irish Potato Bread
5/8 c milk
3/8 c potato water (water that was used to cook the potatoes)
1 1/2 Tbsp unsalted butter
1 1/2 Tbsp sugar
1 1/2 tsp salt
1/3 c plain mashed potato at room temperature
3 c all-purpose flour
1 1/2 tsp active dry yeast
Place all ingredients in the bread machine pan in order listed. Use standard bake cycle and light crust, 1 1/2 lb size. Remove loaf when done baking and let cool for an hour before slicing.
What I liked about this bread: It smells GREAT baking.
What I disliked about this bread: It's kind of a pain to prep for since you have to use room temperature mashed potatoes, but boy, is it worth the extra time. Just don't do what I did and drain the potato over the sink...I ended up making ANOTHER potato so I would have the potato water. The second time, I remembered.
Cool kitchen gadgets used: My Kitchen Aid mixer is awesome at mashing potatoes.
Tastiness factor: This bread is SO smooth, SO soft and SO GOOD. It is great with jam but if you have it plain with butter, you can really taste the potato. It is fantastic. I have made it twice and it has turned out perfect both times.
Peaches and Cream Pie
1 pie crust, refrigerated
1 lb bag of frozen peaches, partially thawed, or 3 cups fresh sliced peaches
1 c heavy whipping cream
1/2 c powdered sugar
pinch of salt
1/2 tsp vanilla extract
1/2 c packed light brown sugar
Place pie crust in deep dish pie plate and freeze for fifteen minutes. While crust is freezing, preheat oven to 400 degrees. Combine cream, powdered sugar, salt and vanilla in small bowl and whisk to blend. Place peach slices in pie shell and arrange evenly. Pour cream mixture over peaches and rearrange slices until evenly arranged. Bake pie for 30 minutes. Remove pie from oven, turn oven down to 350 degrees, and evenly cover top of pie with brown sugar. Rotate pie so that the side that was in the back is now in the front. Bake pie until top is caramelized or about 15-20 minutes. Pie will still be liquidy. Cool pie on wire rack and let cool thoroughly. Refrigerate overnight before serving.
What I liked about this recipe: It was really really easy.
What I disliked about this recipe: Keep reading.
Cool kitchen gadgets used: My whisk. I have a Kitchen Aid one. I also used one of those pie plate edge cover things to keep the edges of the crust from getting too brown.
Tastiness factor: I will never make this pie again. The description of the recipe stated that this tastes like peach ice cream. That is NOT the way I would describe it. It never firmed up so when I cut it, all of the liquid went everywhere and it did not have a good taste to it at all. And I followed the directions to a T with cooling.
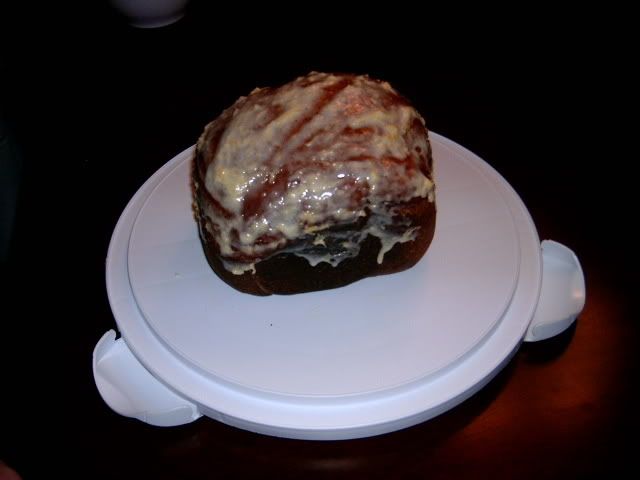
Glazed Lemon Poppyseed Loaf
1/3 c water
1/2 c milk
1 extra-large egg
4 tsp unsalted butter, cut into small pieces
1 1/2 tsp salt
2 Tbsp sugar
2 Tbsp grated lemon zest
4 tsp poppy seeds
3 c bread flour
2 1/4 tsp active dry yeast
All ingredients should be room temperature. Place ingredients in machine in order specified. Bake on sweet bread cycle, 1 1/2 lbs, light crust. Remove from pan at end of cycle and cool for one hour before glazing. To make glaze, combine 2 tsp unsalted softened butter, 2 tsp grated lemon zest and 4 tbsp powdered sugar in small bowl and cream. Mix in lemon juice until smooth. Drizzle glaze over cooled loaf of bread.
What I liked about this recipe: It is very citrusy and not overly sweet.
What I disliked about this recipe: The glaze makes storing it a mess. The recipe said that the glaze would "dry" on the bread, but mine didn't. It's still very creamy and wet.
Cool kitchen gadgets used: My microplaner to zest the lemons, of course!
Tastiness factor: I am still eating it and it is fantastic with my raspberry jam in the morning for breakfast!
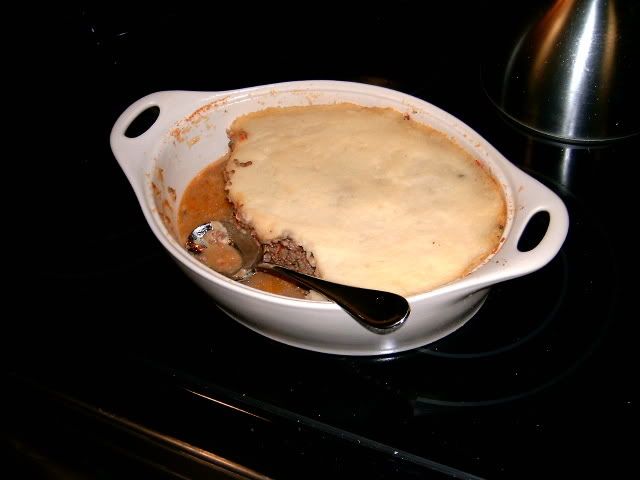
Shepherd's Pie
5 strips lean bacon
2 c finely chopped onion
1 medium green bell pepper, seeded and chopped
1 garlic clove, minced
3 c chopped cooked beef or lamb
1 T Worcestershire sauce
salt and pepper to taste
3 large eggs, beaten
4-6 c mashed potatoes (see below for recipe)
2 Tbsp melted butter
Preheat oven to 375 degrees and grease a 2-quart casserole. In a large heavy skillet over medium heat, fry bacon until crisp and drain on a paper towel. Crumble bacon finely. Add onions, pepper and garlic to the grease and cook until onions are golden, about ten minutes. Put vegetables in a large mixing bowl and add the bacon, meat, Worcestershire, salt, pepper and eggs. Mix until well-blended and set aside. Spread half of the mashed potatoes over the bottom of the casserole. Spread meat mixture on top of the potatoes. Spread the rest of the potatoes on top of the meat and brush the top of the potatoes with the butter. Bake at 375 degrees for 30 minutes.
What I liked about this casserole: Very versatile for switching out ingredients. I used one cup of white onion and one cup of purple onion since I had them left over, substituted red bell pepper for green and used 2 lbs of ground sirloin instead of the chopped cook beef or lamb.
What I didn't like about this casserole: A little lengthy to cook due to the mashed potatoes, but worth it. And the leftovers heat up great.
Cool kitchen gadgets used: I have a silicone pastry brush that I used to brush the butter. LOVE that thing.
Tastiness Factor: Really, really good. I had two servings...it was that tasty! Although now I feel like I'm slipping into a coma...hence the reason why this entry was saved on draft once. McKenna even likes this recipe. I have given it to her twice for dinner and she loves it.
Best Mashed Potatoes EVER
2 lbs peeled potatoes
4-6 tablespoons of unsalted butter, cut into pats
1 c milk
1 c half and half
1 Tbsp salt
Chop potatoes into thirds, place in a saucepan and cover with water. Add salt. Bring to a boil and boil for 20-25 minutes or until potatoes are tender. Combine milk and half and half in small sauce pan and warm but do not scald; keep warm. Drain and mash using a potato masher, mixer or ricer. Return potatoes to the hot pot and stir/cook for about two minutes to dry out the potatoes. Add butter, one pat at a time, until butter has melted. Add milk in a slow stream, mixing. Add salt and pepper to taste.
What I like about these potatoes: They turn out perfectly EVERY TIME.
What I dislike about these potatoes: This recipe doesn't quite make enough, but when I have tried to double it, the potatoes aren't as fluffy. I don't know why.
Cool kitchen gadgets used: Again, LOVE my mixer! But I also have a small saucepan that I bought at Bed Bath and Beyond to go with my Emerilware set that has a little notch in it for pouring and it is perfect for the milk mixture. What I usually do when I make this for company is to warm the milk while the potatoes are boiling and when it gets hot enough, I move it to my warming zone. When I make the potatoes just for me, I usually will just microwave plain old milk and skip the half and half altogether. They still turn out great.
Tastiness factor: I have made these for a lot of meals and they are always a hit. I could eat them forever. I have tried several mashed potato recipes over the years, and these are THE BEST I've ever had. They are SO good. Another variation is to boil five or six cloves of unpeeled garlic with the potatoes and blend them into the potatoes...they are also very good that way as well.
Erica's Tips: Don't cut down on the salt called for. You will need the full amount to fully flavor the potatoes. Make sure you use unsalted butter as the potatoes will be too salty if salted butter is used. And TASTE the potatoes before you salt them to eat. I'm a serious salt freak but even I don't have to salt these potatoes...the salty boiling water flavors them perfectly. Also, I have yet to use all of the milk/half and half that has been called for. Usually I cut it to a cup of liquid (1/2 c of each when I am making it for company and 1 c of milk when I make it just for everyday) and it's more than enough. Supposedly the moisture contents of your potatoes dictates how much milk you will need and I guess my potatoes are moist enough that they don't need all of the milk.
And...the phenomenon that is coconut cake.
Apparently this is a real Southern tradition. I had no idea...and I lived in North Carolina for a while.
I really love coconut. I think it is one of the best things ever to put in desserts. My fascination with coconut involves German chocolate cake, pina coladas, Mounds, Almond Joys, Malibu rum, macaroons, coconut shrimp, coconut cream pie, and even those coconut slushies. I love everything coconut.
I was looking on the internet for cake books probably about three months ago and came across this one on the internet that has an entire chapter devoted to coconut cakes. At that time, I had never had coconut cake, but I was sure that I would really like it given my love of everything coconut. So I bought it and made a coconut cake at Christmas. It was a HUGE hit with my dinner guests and I even pawned a piece off on my friend D's husband S (by the way, D, how did he like it?) so none would go to waste.
One of my coworkers has been asking me to make him a coconut cream pie for months after hearing that I am quite a baker. He saw me eating a piece of coconut cake for lunch after Christmas and was rather miffed that I did not bring him a piece despite his love for coconut that rivals mine. Yeah, give me an excuse to try it again. My last one was a little thin on the frosting and I've been dying to try it again to get it perfect. So, here is my coconut cake:
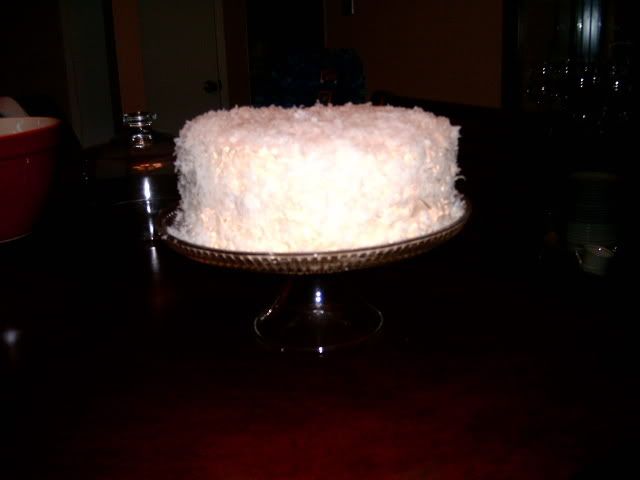
Classic Coconut Cake
3 c cake flour
2 tsp baking powder
1/2 tsp salt
1 tsp vanilla extract
1 c milk
1 c (2 sticks) butter, softened
2 c sugar
4 eggs
Frosting:
1 c sugar
1/2 c water
2 egg whites
3 c shredded coconut
Preheat oven to 350 degrees. Grease and flour two 9" cake pans. Combine flour, baking powder and salt in small bowl. Combine vanilla and milk together in separate bowl. In large bowl, beat butter at medium speed until creamy. Add sugar and continue beating until mixture is light and fluffy. Add eggs one at a time and beat well after each one until mixture is thick and smooth. Add about 1/3 of the flour mixture to the batter and beat on low speed, add 1/2 of the milk mixture and beat well, and repeat this until ingredients are all in and mixture is very thick and smooth. Immediately place the batter into the pans and divide it evenly. Bake for 25-30 minutes or until cakes are golden brown. Remove and cool on wire racks for ten minutes. Turn out the cakes onto racks and cool completely before frosting.
To make frosting, stir sugar into water until dissolved and bring mixture to gentle boil on stove. Cook for three minutes without stirring. Boil for 5-10 minutes more, stirring constantly, until syrup has thickened and will form a 2" thread when dripped off a spoon. Set syrup aside and let cool slightly. Place egg whites in a mixing bowl and beat on high until they are bright white, shiny and cloud-like. Stream syrup into bowl while mixing to blend into white fluffy icing.
To ice the cake, place one cake layer on plate and spread thick layer of icing over top. Sprinkle with coconut. Place second layer on top and repeat. Ice sides. Place cake stand over a cookie sheet and sprinkle coconut over the top. Pat handsfuls of coconut onto the sides and fill in any bare spots.
What I like about this cake: Very spongy and delicious.
What I dislike about this cake: The frosting is really just not enough...it would be a little better if it were thicker. Plus, I almost kind of want to mix the coconut into the frosting for the middle layer...with the coconut on top, it doesn't allow the layers to really stick together so when you slice the cake, the layers fall apart. Make sure and read Erica's tip before doubling the frosting.
Cool kitchen gadgets used: I have these Magic Cake Strips that I have been using for cakes lately. You can get them at cake stores. You get the strips wet and then wrap them and pin them in place around the pans. The moisture keeps the layers from doming in the middle. They are great for cakes. Makes frosting them a piece of cake!
Tastiness factor: It is a perfect coconut cake. SO freaking good, I can't stand it. It is so perfect for coconut lovers.
Erica's Tip: After making it the first time and my dinner guests telling me (I asked for blunt feedback) that it really needed more frosting, I decided to double the frosting this time and see if that made it better. I do NOT know what happened, but I think the syrup was so much that it deflated the egg whites. It never set up. So I threw that out and made two seperate batches instead. That would have worked fine except for some reason one of the pots hardened the sugar into candy. So I made a FOURTH batch and the sugar caramelized and turned an amber color. That's the reason why this cake is kind of a peach color. It was still great though...but it was an extremely frustrating experience. Anyway, lesson about the frosting; don't double it in the same batch. Double it, but make the frosting twice instead of doubling the ingredients.
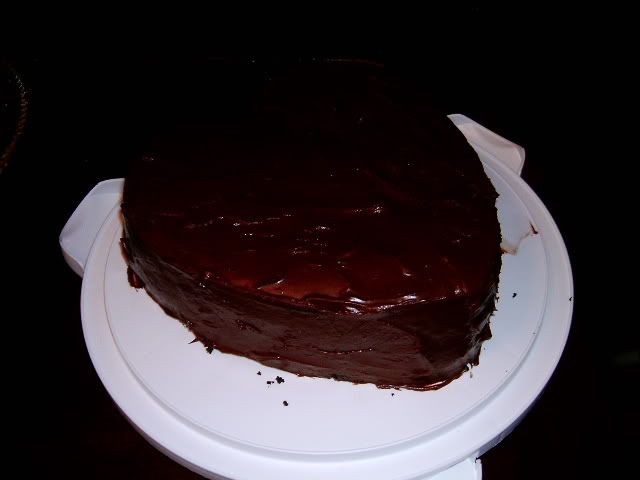
And my creation from last night...this is McKenna's favorite cake and also the favorite of my nieces and nephews. I have made it several times and everyone loves it, I made it for her second birthday party, and last night we made it for girls' night. Great, great cake.
Perfectly Chocolate Cake 2 c sugar
1 3/4 c cake flour
3/4 c unsweetened cocoa
1 1/2 tsp baking powder
1 1/2 tsp baking soda
1 tsp salt
2 eggs at room temperatur
1 c milk at room temperature
1/2 c vegetable oil
2 tsp vanilla extract
1 c boiling water
Preheat oven to 350 degrees and grease two 9" cake pans. Combine dry ingredients in mixing bowl and either mix on stir setting or whisk. Add eggs, oil, milk and vanilla and beat on medium speed for two minutes. Stir in boiling water. (Batter will be REALLY thin and watery...don't panic.) Pour into pans. Bake 30-35 minutes. Cool for ten minutes on wire racks in pans and then turn out cakes and cool completely before frosting.
Frosting:
1/2 stick of unsalted butter, melted
2/3 c unsweetened cocoa
3 c powdered sugar
1/3 c milk at room temperature
1 tsp vanilla
Mix cocoa into melted butter. Alternately add sugar and milk, beating on medium speed to spreading consistency. Stir in vanilla and add more milk if needed.
What I like about this cake: It is so easy to make and comes out perfect every time. The texture is very soft and spongy.
What I dislike about this cake: It's chocolatey chocolatey. What's not to like? I guess if I had to say, probably a little too sweet. But a glass of milk will take care of that.
Cool kitchen gadgets used: I have already professed my love for my Magic Cake Strips. I used my pale pink heart-shaped silicone cake pans last night and they are so cute.
Tastiness factor: I was a tad short on the cocoa for the frosting (maybe 1/2 tbsp) and I realized when typing this recipe that I forgot to add the vanilla last night when making the frosting, but it didn't seem to matter...the cake came out delicious.
I guess that's all for now...seven recipes in one post is probably enough. I'll post some more as I make some other stuff. Happy cooking!


 MoiraKatydid
 emgonz
 emgonz@msn.com


